Showing posts with label DIY. Show all posts

Sunday, March 16, 2014

Me and Julio Down By the Schoolyard

After four years of hanging out with Papaeel and myself, Littlemaneel will be starting preschool tomorrow. Of course I have some anxiety about it, but I know he is a capable little being and I am excited to see him grow socially. He is a caring and empathetic little man and I look forward to him making new friends and am eager to see him explore his identity outside of us. What makes it a lot easier for everyone is that I am employed at the school and will be in the same building as he is and have gotten to know and genuinely like his teachers over the last year. Also, the school I work for now is like no other I have worked at before. It's environments are intentionally created around the emerging interests of our students, and said students are treated with respect and as contributing participants in our learning community. The owner also has a small organic farm where most of the food served comes from, it's very eco-conscious and uses cloth diapers, composts leftovers and so on. I must admit that being at the same school will have a few downfalls, as I learned last week during one of Littlemaneel's visits. He fell and was pretty upset and I was on another playground and could see him, but was not able to comfort him. Talk about tough! As hard as it was, I know it will be necessary for him to receive comfort from others besides Papaeel and myself and was glad he was able to do so. It's hard to hand your baby over to "the world," but I am secure in the choices we've made when it's come to raising him and am hopeful for the best in this new chapter of our lives.  

We were asked to create a family board for him. Littlemaneel had a say in the photos that were used and I'm pretty sure we're representing most of his current favorite people. Here is the finished collage, it was lots of fun to make. I will be cutting out his name by hand and attaching it and the collage to a piece of scrapbook paper tonight.


Littlemaneel was also in need of some rest time essentials. We have a toddler bed sheet and blanket as that is standard preschool cot go-to's, but I decided to step it up a notch and make Littlemaneel a nice little nap mat. While the thought of biking out to one of the many fabulous new and or vintage fabric stores in town and if nothing else, just looking at fabric for inspiration came to mind, I knew what I really needed to do what look through what we already had around the house. We have really come a long way in our desire to consume less and make more and that is saying something for this mama who once had so many shoes she would've made Imelda Marcos blush (okay, that was exaggerated to make a point. I have probably never owned 1,000 pair of shoes in my life, much less at once). I came across his first duvet/play mat from when he was a babyeel and I flashed back to days long gone. Gosh, it really did come in handy back then, but really wasn't getting much use these days. Here's my then Babyeel hanging out on it back in it's high time of use. Those brows!


I knew it was the perfect thing to be upcycled into a nap mat. It was comfortable and even more so when double in half. I also had this badly warped pillow in need of repurposing and decided to throw it in the mix. At the time, I wasn't sure what I would use for the actual blanket part of this mat, but came across some blue fleece (not pictured) that I had stocked up on for cheap a few winters back.


I had everything I needed and was ready to create. Once the pillow was re-fluffed to the size of the folded in half duvet, I was ready to sew and attached it to the duvet with a zigzag stitch. I altered the duvet cover to the size of my new mat and attached my blue fleece to one side to create my built in blanket. I left a small opening at the bottom of the cover to continue to make it easy to wash. I stuffed the mat into the cover and we were ready to rest!


Funny enough, Littlemaneel was asleep by the time it was ready to go, so Big Bad Wolf had to step in and do a bit of testing/modeling for me.


He looks happy! For a final touch and convenience of transporting, I added velcro to a piece of canvas strap and wah-lah-a nap/rest time mat for our boy's journey into preschool!


Until next time,
Mamaeel

Sunday, March 9, 2014

Baby Love


Babies are the best! Littlemaneel is a big fan, especially of his best friend's baby brother. He just turned one & we were excited to celebrate this big milestone with our friends. Being that this baby brother already lives in a home overflowing with toys, parents insisted that we didn't need to go out and buy baby anything. We agreed and decided to make baby a few fun toys for his first birthday instead. Baby loves music and so we agreed that a couple of jingle sticks were a must.


We know that baby is mastering the pincer grasp and that he is exploring the world around him with his hands, perfecting those fine motor skills. We figured a toy that would encourage said skills was a no-brainer. At this age, Littlemaneel loved dropping things into slots, shaking the container around and then dumping out the things just to do all over again and we are guessing this baby will too!


Until next time,
Mamaeel


Sunday, February 9, 2014

Everybody's Gotta Learn Sometime

We are lucky to again live in a city with a Dick Blick. While it is now one of many art supply stores in the area, I am still a fan and stop in when I have time and am in that neighborhood. On our last visit, we made one purchase and that was a 12pk of Scratch Art Scratch Foam. We are big into printmaking and have wanted to expose Littlemaneel to it. These soft boards only require a pencil or back of a paintbrush to imprint your design, so we just handed Littlemaneel a board and pencil and let him draw to his heart's content. He started off drawing a mountain with The Cat in the Hat on top and went on to add his face and so on. Once he was finished, we got out the brayer and paint and went to printmaking town! It was a fun process and he really got into it. 


Finished prints (the black one is the foam board covered in paint).


Littlemaneel designing his foam board.


He really loved rolling the brayer in paint and then onto his board.


Rolling, rolling, rolling.


Now we press his board onto a piece of colored paper we've selected.


He picked up the process quickly and was adamant on not receiving much assistance.


Pulling the board away from the paper.


First finished print!

Definitely something we will be doing again! Papaeel and I are even thinking about creating a few boards. Next time, we will make sure we are stocked up on fabric paint so Littlemaneel can print a t-shirt or two! With the freezing rain keeping us in most of today, we are thinking we'll incorporate some of the prints we made into littlemaneel's valentine's. We'll be sure to post pics of the final outcome.


*Apologies for the poor photo quality. These were all taken on the iPad as we cannot find our battery charger for our DSLR (Nooooooo!). We recently took a trip home and are hoping it's still wedged in a suitcase somewhere.

Until next time,
Mamaeel


Saturday, November 10, 2012

Candy-O, I need you so...

Did you survive Halloween? We had a good time partying it up the weekend before, but I'm always left wanting more, especially when it falls on a weeknight. I love Halloween, but we are those, "weird parents" who don't really eat or give our 2 year old candy, so that pretty much leaves us with nothing to do but carve pumpkins on the holiday itself. While our community has a few cool events we go to, they are always the weekend before & the older littlemaneel gets, the more weary I grow of the confused, sometimes dirty looks we get from the dressed up attendants when we refuse the candy. Look folks, I'm sure there will come a day when our child will eat some candy, ok. All we are saying is, he's 2 & he's got the rest of his life to eat candy. If it makes you feel better, we do allow him to eat fair trade, organic dark chocolate chips from time to time. Long story short, as soon as littlemaneel is old enough, I think we'll start hosting Halloween parties on the night of Halloween (don't go thinking they'd be lame-I'm talking bonfires, bobbing for apples, hot cider, smores & more)! Here he is in his, "mom's original idea was way too involved, so at the last minute she cranked this one out" T-Rex costume. 


So Halloween has come & gone & now we're less than 2 weeks away from Thanksgiving! We're lucky enough to have gotten our goods into a great new local shop & our stuff has actually been selling rather well! With two weeks away & counting from Small Business Saturday (& Black Friday), we've been steadily building & restocking inventory. Check out our new Fancy Little Pillows...


Ok, so it hasn't all been profit based crafting. Here's a t-shirt I just had to make for littlemaneel. While it isn't for sale, I suppose it could be. 


I am being beckoned as there are lots of things that still must be sewn, cut & glued this weekend, so I must go. Until next time!

Friday, October 26, 2012

i'm more at home in my galaxie......

happy friday folks! halloween is fast approaching & i am rushing to finish costumes. worked on mine last night & produced these galaxy pants for my meteor costume. a friend is having a halloween party with a "vs" theme. i've known since february of this year that littlemaneel would have to be a dinosaur for halloween because of his ever-growing love of them. after being invited to this party, papaeel & i thought about what the ultimate dinosaur vs match would be & decided on a meteor. gotta get back to making, hope all your halloween crafting is done or coming along!


here's the link to the leggings that inspired mine. i tweaked it a bit, but you'll get the gist!

Friday, July 13, 2012

hey mama wolf.....

fridays are pretty great because i get to spend the whole day with littlemaneel. we make the most of the time he is awake & i make the most of the time he is asleep (yes, he still naps-thank goodness). today, i introduced him to one of my favorites from my childhood. he's gonna need his own record player soon. still searching for that perfect vintage portable one (whatever happened to my old one???)....


dedicating some craft time to myself today. i found this shirt while rummaging at a church sale & considered cutting it up to make multiple usamimi's as the material is perfect for those, but i just love the pattern too much & have decided to keep it for myself. it's a little big, so my first sewing project of the day is to make it fit! and then i'll give the rest of my time to the stack of work's in progress....


i'll be sure to post pics of the outcome. wish me luck!

Sunday, July 8, 2012

making time...

i don't know about you, but i am forever running out of time! between working & everyday tasks, it's hard to get stuff to sell made! well, unless you give up sleep & that just can't happen. i need all the energy i can get! toddlers require a ready-to-go parent at all times! 
papaeel & i were able to allocate a few hours last week to punching out & stamping over 100 picks (we were only able to sand about a dozen). we found perfect sized pick bags at our local crafty store & papaeel has been working on packaging design. here are a few of my favorite picks...


i put the stamps that have been acquiring dust in my craft closet to work. the wood grain one hasn't seen the light of day since making our wedding invitations & that was in 2007! i love those & the fortune teller ones. i inked the stamp (StazOn is a fast drying solvent ink that will adhere to plastic), placed it ink side up on the table, then placed the picks on where i wanted. i think these will make for nice & unique pick sets. 

one of my life-long friends is pregnant with twins. they were a beautiful & happy family of 3, but they decided to try one more time as she's always wanted a little girl. well, they're getting their girl alright-and times two!! i always get excited to make girly things & this time i got to go twice as girly! i decided i'd make her a twin-sized tummy time mat. i remember wanting one for littlemaneel when he was babyeel & after seeing one a friend had, i knew i could make a decent version myself & for under the $40 i saw most going for. the end result was perfect & i've gone on to make many for friends & family. this was my first, "double-wide." here it is all sprawled out.


a close up of the pillow & the crinkly chew toy i made. 


& here it is, all rolled up & ready to travel!


of course i had to make headbands! i've made & sold bow tie headbands, but these were a little different as they would be worn by newborns. i used FOE(fold over elastic) usually found with PUL fabric & used in diaper making. it's soft elastic & wouldn't squeeze too tightly on a little head. i had a bit left over & put it to good use. i had to package them up, they were so cute!


here are two i made to match the onesies i made them. they are simple floral headbands made from a small piece of purple knit i had lying around. again, knit is a good fabric for baby headbands, cause it won't squash the brain!


last but not least, the onesies. "who's who?" for twin girls. we are super excited to meet these little bundles of joy! littlemaneel just loves babies!


Sunday, June 17, 2012

child is the father of the man....

has it really been 8 months since i last posted?? wow! that's nearly long enough to cook a baby in a belly oven (fyi-that's not what we've been doing)! we've just been busy working, playing, making, pinning & the like. so, today is father's day. i was really hoping to post this freezer paper stencil tutorial before today, in case those of you out there would like to make your own father/husband, etc.. a matching father's day tee, but i'm a procrastinator & it was hard to get done without papaeel realizing what i was posting. i suppose if you're a procrastinator like me, this is probably perfect timing!


were you aware that if you cut freezer paper down to a 8 1/2 x 11 sheet, you can put it (shiny side up) right into your printer & print on it? this is a recent discovery for me & after countless stencils i've made out of freezer paper with a regular piece of paper with the image printed on it under the freezer paper, i'm uber happy to save paper & a step!


before you print, you must decide what image it is you want on your tee. it took me a minute to decide as there were many potential tees papaeel would love. i considered a nod to one of our favorite movies, the royal tennenbaums & making a tee with royal on it for papaeel & then another with richie "the baumer" on it for babyeel (we could probably start referring to him as littlemaneel, because he is getting further & further away from being a baby). i decided i would make them matching melvins tees. we love the melvins (even littlemaneel can't resist rocking out to them whenever they're on)! we actually got to see them live last month & oddly enough got to meet king buzzo himself! there was no parking near the venue, other than at walgreens & we decided to be blatant sign ignorers & park in their lot anyway. as we were getting our tickets ready a car pulled into the lot & parked right next to us. when i looked over, i noticed the driver was none other than king buzzo! he was so gracious & even let us capture his image on camera! (yes, we could've further helped support the band by buying tees directly from them, but at $20 a pop, we decided $40 would fill our tank to get home & even pay for a late night meal, so we skipped out on the amenities)


so, pick your image & print it directly onto the dull side of your freezer paper (my image was ready to go. should you decide to use a more detailed image-such as a person, you may need to edit your image to make it black & white or use the stamp effect in photoshop). once printed, take your trusty xacto blade (mine has a swivel head, perfect for curves & details) & cut out your stencil. my original image had blocks around the letters-which i love, but made more difficult for this stencil, so i just decided to ignore those blocks & cut out the letters.


once it's completely cut out, you're ready to iron your stencil to your shirt (i jumped the gun & forgot to take pics until after i printed the first shirt-normally your stencil wouldn't have paint stains on it when it's first cut like the one shown below).


decide what colors you want your image to be. i just went with the colors the image already was (okay, so i couldn't help but make myself one too, hence the blue color shown. i made mine a different color & on a different colored tee, so as not to interfere w/the father & son matching tees). you can use fabric paint as i did, or acrylic paint. i used a foam brush for each color & brushed on an even coat. i only did one coat, but feel free to do another if you so choose.


let the paint dry completely, then remove your stencil & iron it onto your next shirt & your ready to paint your next tee! i was not able to find an exact match tee for littlemaneel, so i had a tim gunn moment & i made it work. the shirt i used for papaeel came in a pack, so i just cut up a 2nd tee to make an exact match for my little guy. i've never been one to use a pattern (except for my wedding/bridesmaid dresses) & so i just used an existing tee of H's as a pattern. i think it looks pretty decent!


here are my matching dudes! i love them! happy father's day!


Monday, August 1, 2011

red, yellow & blue.......

i don't know about where you live, but we haven't been so lucky when it's come to heat waves lately. our humidity levels & "feels like" temps have been so high that over the last two weeks, we have rarely left the comfort of our air conditioned home-unless of course, it's to go to the pool. that being said, we've been doing a lot of indoor activities with our babyeel and this last weekend, we made play dough! 


i still have my big book of early childhood activities from college & has it ever come in handy! from years & years of lesson planning to now with my own little nugget, it's inspired many ideas/activities! along with covering things like, gross/fine motor, art, language, science & math activities, it also has a little recipe section in it. we decided to go with the basic play dough recipe, which is as follows:
5 C flour
2 C salt
4 T cooking oil
add water to right consistency (about 1 1/2 C for me)


i mixed the first three ingredients & then slowly started to add water. i soon discovered that it was much easier to take off my wedding ring and mix everything by hand-it was somewhat meditative too. 


just keep slowly mixing in water until you get the right consistency. if you've ever played with real play doh, you'll know what you're looking for, although this dough comes out a little more like the pizza dough kids get at pizza places while they wait for their food than store bought play doh. it should look something like this:


if you want to make colored play dough, you've got a few options. first, if you have food coloring or tempera paint in powered form, feel free to toss it in with your dry ingredients. if not, you can use liquid food coloring. i decided to make 4 colors (all i had), so i separated my big lump of dough into 4 equal parts & i dropped in a few drops of natural food coloring (no red dye #5 for my little guy). knead and if you must, add more color until you get your desired shade of play dough. they all came out good, except yellow. it was kind of weak!


while H is a typical toddler boy in many ways, he also stands alone when it comes to getting easily grossed out. like when it came to helping me mix the dough for one! he refused to touch it and it took about an hour or so after it was made for him to consider holding it in the ziplock bag i put it in and about another hour after that before he was ready to touch & play with the actual dough. papaeel & i had to do some pretty good convincing before he'd give it a whirl and while he's more apt to play with it now, he still kinda cringes when feeling it between his fingers. 


Sunday, July 17, 2011

summertime clothes.........

my goodness! it's been awhile, hasn't it? i've almost forgotten how to blog! we've been busy bees and believe it or not, i (mamaeel) have actually gone back to work on a little more than part time basis. not to the office, but to my first love....co-op records! it was my dream job as a teenager (what child of the 90's didn't dream of working in a record store?) & it came to fruition on july 15th 1999. that was my first day and what a surreal day that was. well, now here we are 12 years later & i'm back. a little older, wiser and the only mother amongst the other record slingers. we have fun, and most days i can't believe that i get paid to do what i do! and best of all, business casual doesn't apply! 
so, besides being a mama & wife, slinging records & crafting every chance i get, we've been busy hitting up water parks, hiking on days that aren't too hot, going to story hour @ the local library, spending time with family & friends, and taking in live music! this weekend we had the pleasure of going to pitchfork music festival in chicago. this was H's 2nd year and he was definitely more active this time around! i think he literally said, "hi" to every person there and better yet, he thoroughly enjoyed shaking his little tush to the live music! while we tried to express the magnitude of what he was witnessing, "son, that is thurston moore!" he wasn't impressed & only cared that the man on stage was providing us with a danceable tune. this child was full force all day & by the time animal collective played (they closed friday), H was so exhausted he was fast asleep about 2 songs in, which means he missed, "brother sport," his favorite animal collective song. we tried to wake him to no avail, so i had no choice but to dance enough for the 2 of us (literally-i was wearing H the entire time & my back is now in dire need of an adjustment!). haven't heard that song, or seen the video? well, here it is just for you! they've definitely embodied the spirit of paul simon in this song, so don't be surprised if you find yourself wiggling around a little bit.


since we were going to a music festival, i wanted to make H something special to wear to celebrate the occasion. last year he wore this adorable kung fu cotton shirt that belonged to my niece when she was a baby (she is now 22 & is getting married next month!) & while it was a little big at the time, sadly it doesn't fit too well anymore. didn't he look too cute, though? god, i love this picture!


i'd seen these adorable wings on pinterest months ago & wanted to make them & figured pitchfork was good enough of an occasion as any to wear them. you can find the tutorial i used for the wings here; http://llevoelinvierno.blogspot.com/2011/03/make-alitas.html
it's a pretty great blog! she gives measurements for the wings, but since her little one is older than mine, i just measured H's arms & back so his wings would be a good fit. i cut out the base of the wings from material that looked "pretty" from both sides. it's a woodland themed tapestry we've had that has been used for everything from making a slipcover for H's glider that we picked up at a garage sale before he was born, to a floor pillow i made for H, to a wall hanging, to this and there is still some left!


i used everything from scrap material to dad's old shirts for the "feathers." i really like how the different prints & colors came together! 


it was mildly tricky to get the right placement of the first feather onto the wing backing, but once i got my rhythm, it was smooth sailing. 


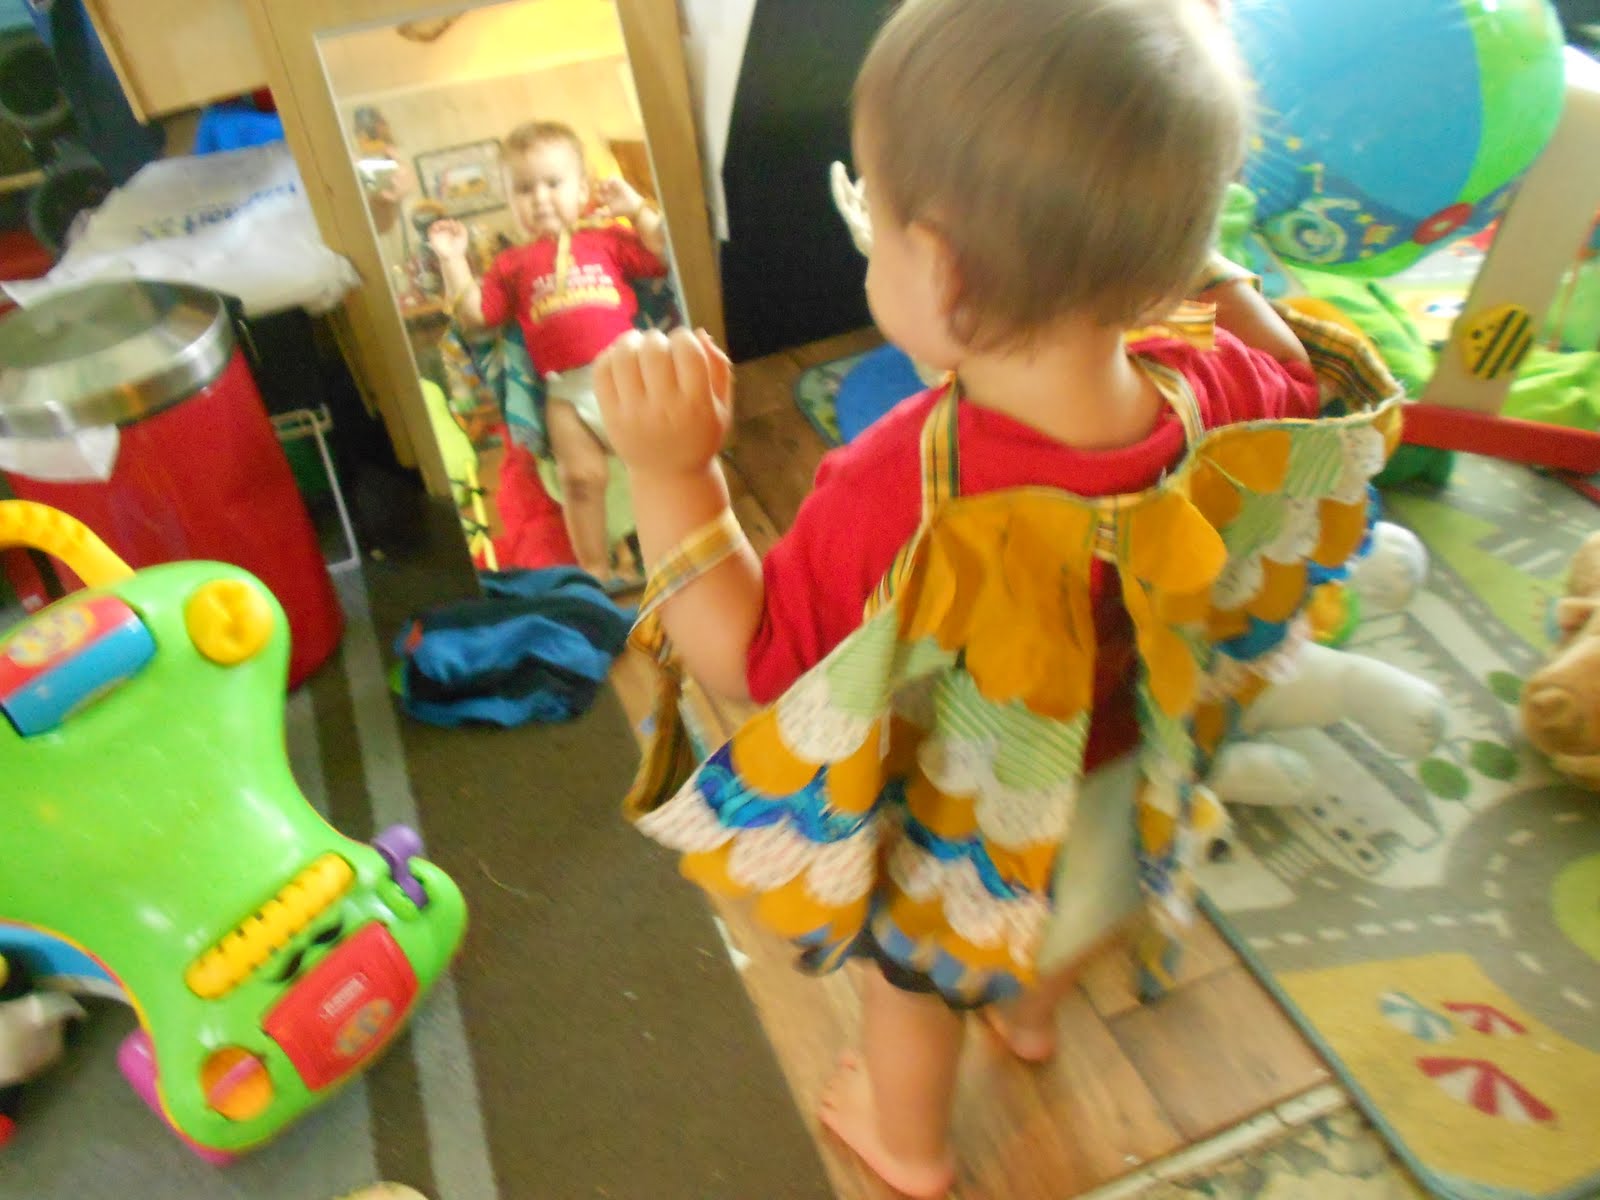
before i knew it, i had a set of matching wings! i used my rotary cutter to trim up the edges & then i took some ribbon and made neck ties & two little arm straps.


wah-lah! a complete pair of one of a kind wings! it took a little convincing before H would let me tie them on & keep them that way. 


here he is at pitchfork wearing his wings, enjoying the sand in between his toes. what a little hippie!